
Timely Transports (Part 2)
In part 1 I outlined the difficulties with what I was trying to do (combine a boardgame and smartphone, and generate random boards), but also why I want to do it. It has clear advantages, has never been done before, and opens many opportunities.
So let’s see how we go about that.
Everybody make some noise!
Step 1, as always, uses noise to generate a random landscape. I started with Perlin Noise, but switched to Simplex Noise as it gives better results on a grid.
(Why? Perlin Noise will always yield a noise value of 0 if the coordinates you enter are integers. In practice, you get a map with lots of completely straight vertical/horizontal lines, which is ugly.)
I loop through all grid cells, take the average of the noise value of the four corners, and save that as the definitive value.
(Why? After many experiments, I found this to be the best way to capture the roughness of continuous noise on a grid. If I just sample one noise value – say, the center of the grid square – there’s a good chance two squares next to each other both sample the value “0”, whilst completely missing a range of super high values between them.)
This approach does smooth the noise, as you’re taking weighted averages all the time. Even though the noise takes values between -1 and 1, after averaging the extreme values were usually -0.7 to 0.7.
But that’s fine!
Now that I have a grid of values, I convert it to a terrain. After some trial-and-error, the water line became -0.4. (Everything below that is water, everything above is land.) But you can raise this value, for example, and get a huge sea with some tiny islands in it.
Nice!
 1// you can see this as the "resolution" => it determines how large each cell is and how far zoomed in the noise is
 2const z = (this.cfg.cellSize / this.cfg.noiseZoom);
 3
 4// determine noise value per terrain cell (and initialize some other settings for each cell)
 5for(var x = 0; x < this.cfg.widthInCells; x++) {
 6  this.terrain[x] = [];
 7
 8  for(var y = 0; y < this.cfg.heightInCells; y++) {
 9    // take average of corners in perlin noise
10    var weight = 0.25
11
12    var noiseVal = weight*noise.simplex2(x*z, y*z);
13    noiseVal += weight*noise.simplex2((x+1)*z, y*z);
14    noiseVal += weight*noise.simplex2((x+1)*z, (y+1)*z);
15    noiseVal += weight*noise.simplex2(x*z, (y+1)*z);
16
17    this.terrain[x][y] =
18    {
19      'val': noiseVal,
20
21      'isForest': false,
22      'forestFrame': -1,
23
24      'partOfPath': false,
25      'pathSprite': null,
26      'pathTypes': [],
27
28      'cityAllowed': true,
29      'city': null
30    };
31  }
32}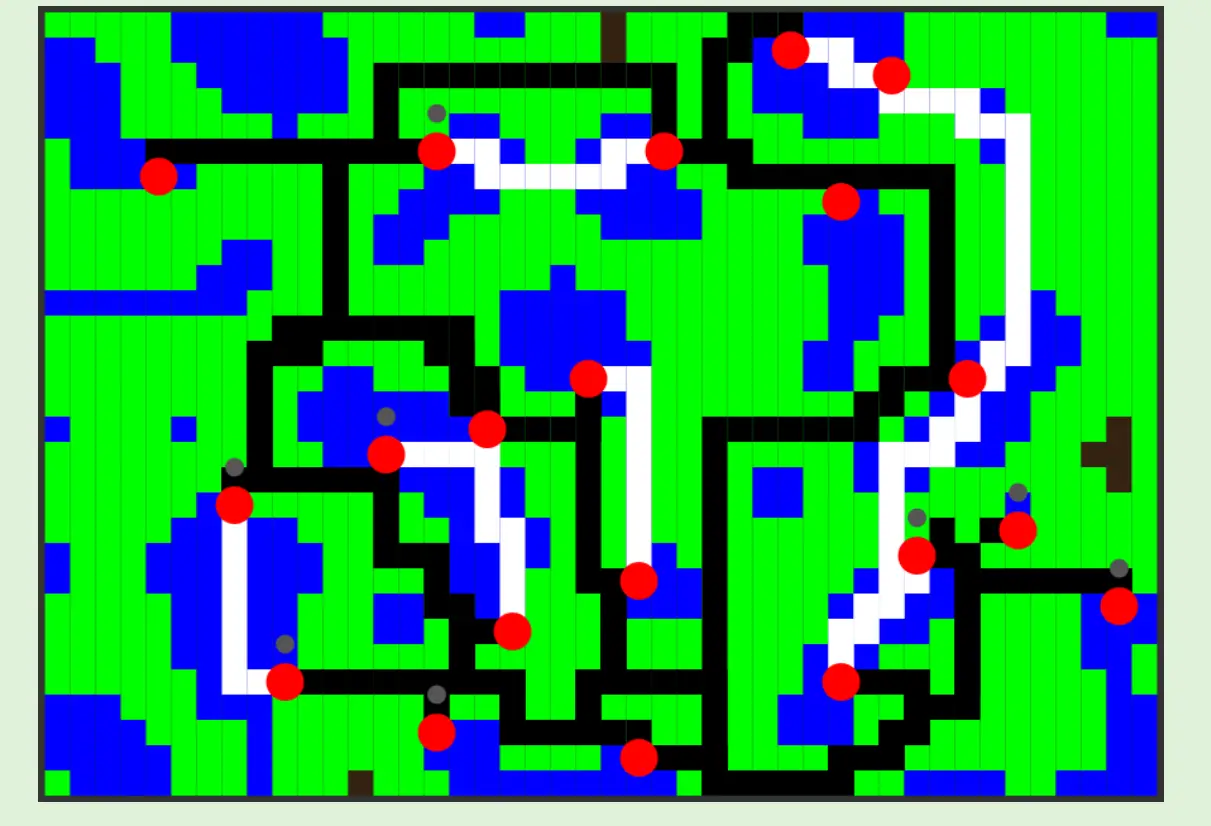
(This image already has paths between cities, which I’ll discuss soon. I just didn’t have any earlier screenshots of the progress, sorry. And yes, the colors are ugly, that’s how it always starts :p)
Placing Cities
This step confirmed a famous quote from the game industry (I’m paraphrasing):
“Whenever you write a new feature, start with the absolute dumbest and most naïve approach possible. It will often turn out to be the right one and save you a lot of time.”
A year ago, I worked on a “pirate game” that needed to know the boundaries of islands. (This project eventually went nowhere, but it taught me everything I use these days in my newer projects. To prove this, it will soon pop up again!)
I copied this code and changed it to get the boundaries of lakes instead.
How does it work? Really simple: it loops through all water tiles and checks the neighbours (top, right, bottom, left). If any of the neighbours is a land tile, then this water tile must be at the edge!
Why do I need the boundaries of lakes? Because traditionally, and especially in the jungle area (in which this game is placed), people placed settlements near running water. I want to do that as well!
The city placement algorithm now became very simple:
Pick a random tile at the edge of water.
Check if any other city is nearby (I don’t want cities too close to each other)
If so, retry with a new tile
If not, continue
Place the city on this tile, disallow all tiles within a certain radius.
Below is the code for this whole algorithm.
 1/*
 2    STEP 1
 3    Go through whole grid, check neighbours, and mark locations at the edge of the water
 4    (in the code, these were called dock locations, to remind myself they are a bridge between water and land)
 5
 6    NOTE: Perhaps more optimized to keep a list of water cells and only go through those,
 7          or do this action within another loop we're already doing
 8          but I usually separate these things for clarity's sake
 9*/
10
11for(var x = 0; x < this.cfg.widthInCells; x++) {
12  for(var y = 0; y < this.cfg.heightInCells; y++) {
13
14    if(!this.terrain[x][y].isWater) {
15      continue;
16    }
17
18    var neighbors = [[1,0], [0,1], [-1,0], [0,-1]];
19    var waterNeighbors = 0;
20    for(var n = 0; n < 4; n++) {
21      var newX = x + neighbors[n][0], newY = y + neighbors[n][1];
22
23      if(!this.outOfBounds(newX, newY) && this.terrain[newX][newY].isWater) {
24        waterNeighbors++;
25      }
26    }
27
28    // place city on water edges, but NOT if they are very close to the bounds of the map
29    // (this looks ugly and probably cuts off the city name/details)
30    if(waterNeighbors < 4 && this.distanceToBounds(x, y) >= this.cfg.minDistanceToEdge) {
31      this.dockLocations.push([x,y])
32    }
33  }
34}
35
36/*
37    STEP 2
38    for each city, place it somewhere it's allowed (dock location and not too close to something else)
39    then disallow any cities in a certain radius
40    (and turn it into a capital, if we still need those)
41*/
42
43for(var i = 0; i < numCities; i++) {
44    var pos, x, y
45    var tooCloseToCity = false;
46    do {
47        pos = this.dockLocations.splice(0, 1)[0];
48        x = pos[0]
49        y = pos[1]
50
51        tooCloseToCity = !this.terrain[x][y].cityAllowed;
52    } while(tooCloseToCity && this.dockLocations.length > 0);
53
54    if(this.dockLocations.length <= 0) {
55        this.generationFail = true;
56        return;
57    }
58
59    // remember this city
60    var newCity =
61    {
62        'x': x,
63        'y': y,
64        'capital': null,
65        'connections': [],
66        'connectionGroup': null,
67        'wantedGoods': [],
68        'airport': false
69    }
70
71    this.cities.push(newCity)
72    this.terrain[x][y].city = newCity
73
74    this.disallowCitiesInRadius(x, y);
75
76    // make it a player capital, if still needed
77    if(i < this.cfg.playerCount) {
78        newCity.capital = i;
79    }
80}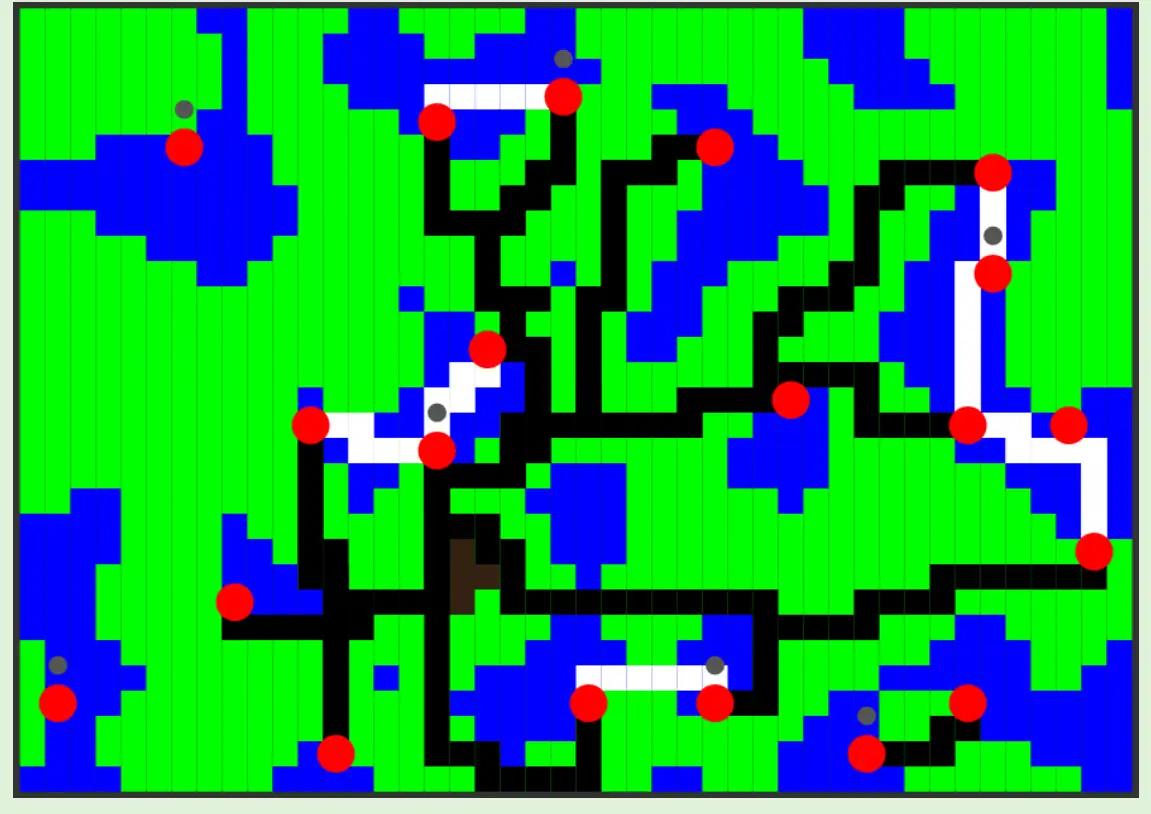
Creating Connections
This was the moment I realized why the approach above worked so well: it allowed me to create both routes over land and over sea, because each city was on the bridge between both worlds.
This is an overview of the algorithm:
Go through all cities.
Check all cities that have not created their connections yet.
Check path over water.
If it doesn’t exist, check path over land.
Once we have all possible paths, sort them based on distance.
Remove those that are too long, then pick random from the available ones.
(If at the end of generation, a city has no connections, give it an airport => this will change in later versions, as you can probably already see the flaw in this reasoning.)
If you do this, you automatically get a collection of paths over land and over sea, like this:
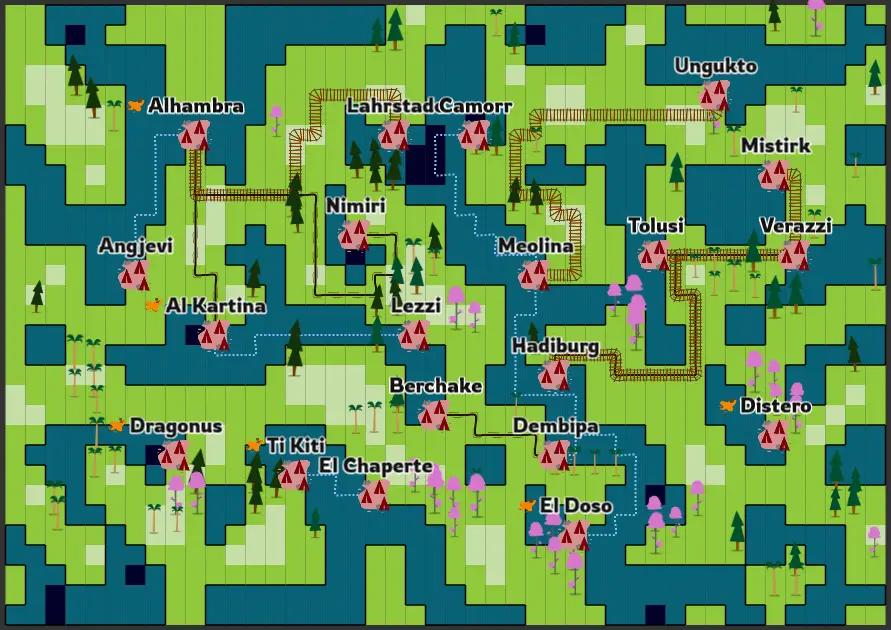
Again, this is a map from a later stage of development. (I should really learn to take screenshots that better suit the devlog.)
Side note: in the previous section I talked about creating a list of “water edge tiles”. I used this list for another very important thing as well! I used it to create an outline for each body of water. If you look closely at the image, you’ll see that each lake has a thick blue border. This makes a huge difference in the clarity of the map.
Pathfinding
But, you might ask, how do you find the path between two cities?
Aha! The “pirate game” returns! In that game, I needed to very quickly find the shortest route between all trading harbours in the game … on a regular basis. There were usually 10-20 harbours, which needed to update their routes roughly once every 5 turns.
As such, my pathfinding algorithm had to be fast and customizable.
That’s why I wrote my own pathfinding script:
It uses A*
But on a grid => all nodes are automatically connected to all neighbours (top, right, bottom, left)
With some space where I can input very specific changes/requirements/additions
I won’t explain the first two parts, as there are countless videos and Wikipedia pages on that. (And I don’t even think my implementation is that good, I only know it’s fast and does exactly what I want.)
But the third part will benefit from some examples.
Issue #1: if I create paths between random cities, there’s a high chance these will nearly overlap or run side by side for a few tiles. This looks ugly. In real life, such paths would be “merged” with an intersection.
So, in my pathfinding algorithm, I said the following: “if this neighbour already has a path of the same type as you, give it an extremely low weight.”
In other words, make that connection so cheap, that the algorithm will probably take it. This way, routes “snap” to existing routes of the same type.
(This isn’t perfect, but it solves 99% of the cases.)
Issue #2: If I create a path over land … the shortest path will almost always be one that goes along the shoreline. The water is the obstacle. The shortest path around the water is by literally following the edge of the water. This looks ugly.
Instead, I want paths over land to stay near the middle of the land, and paths over water to stay near the center of the water.
To do so, I said the following: “when creating a path over land, give nodes with a higher noise value a lower weight” (For water paths, the inverse holds.)
Small changes, but vastly improved results. (All because of that unfinished pirate game!)
Nice Roads
Okay, so we have connections between cities which are as short/optimal as we can reasonably expect.
How do we make them look nice? I created an image for each road type (water, car, train) containing 4 frames. Each frame was one of the possible configurations such a road could have.

Then I replaced my rectangles (from previous images) with this spritesheet, checked which of our neighbours had the same path type, and chose the correct frame and rotation.
This is a monstrous piece of code which I’m not going to show. There are probably better ways.
(I basically run through all neighbours and track the longest sequence of existing neighbours. If I have three subsequent neighbour connections, starting from the left, I know I need a 3-way connection which is rotated 180 degrees. Yeah, it was annoying to write. But once it works, it looks really nice!)
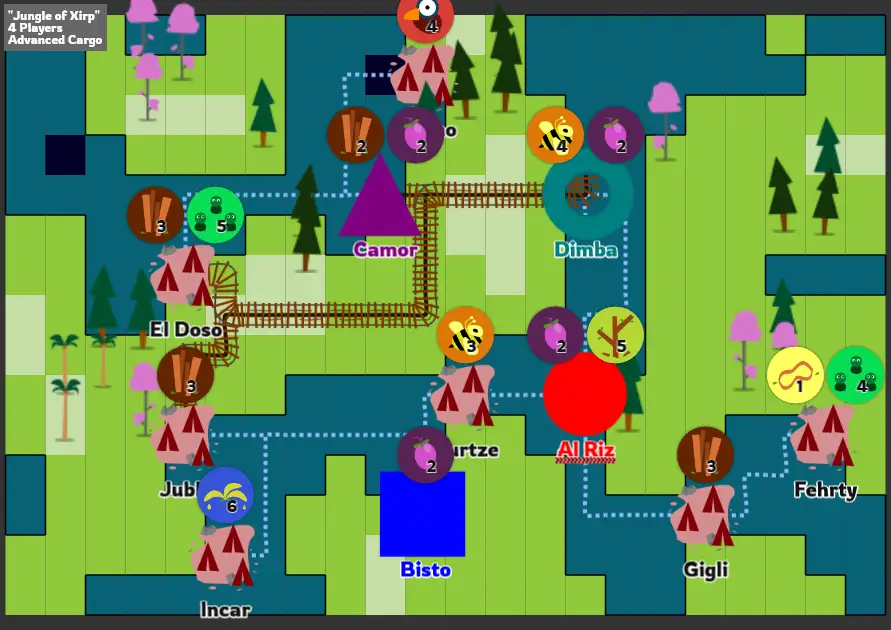
This was also the point where I chose the nicer colors. (I wanted it to give a more “faded” look, instead of bright colors.) I created a quick image for the cities, and saw … that the map was quite empty and most roads looked boring. How do we solve this?
To keep these articles to a nice length, I’m going to break it up here and continue in part 3! See you there.