Sectioning
The first step in creating any structured project is sectioning: dividing the text into sections, subsections and paragraphs. This creates hierarchy and clarity. LaTeX has very good support for this, as long as you don’t want a hierarchy more than 3 levels deep. But that would result in a mess anyway 😉
These sectioning commands are available, in order of importance:
| Command | Hierarchy Level |
|---|---|
\part{name} | -1 |
\chapter{name} | 0 |
\section{name} | 1 |
\subsection{name} | 2 |
\subsubsection{name} | 3 |
\paragraph{name} | 4 |
\subparagraph{name} | 5 |
Two important notes:
- Chapters are only available in books and reports.
- Letters don’t have any sectioning commands, and using them in such a document will result in an error.
 1\documentclass{book}
 2
 3\begin{document}
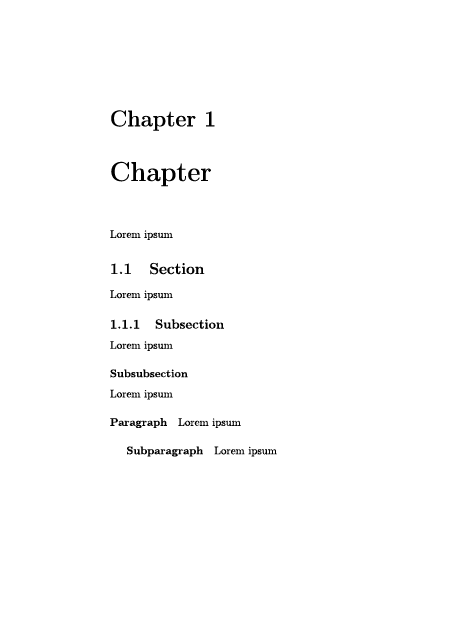
 4\chapter{Chapter} Lorem ipsum
 5
 6\section{Section} Lorem ipsum
 7
 8\subsection{Subsection} Lorem ipsum
 9
10\subsubsection{Subsubsection} Lorem ipsum
11
12\paragraph{Paragraph} Lorem ipsum
13
14\subparagraph{Subparagraph} Lorem ipsum
15
16\end{document}
Advantages of Sectioning
It keeps your documents structured and well-organized. Both behind the scenes and to the reader. Because that’s all that LaTeX is: a way to transform a piece of text, visually, so it’s as easy to read and compherend as possible.
But, sectioning also simplifies your life in other ways:
- They automatically gradually decrease font size. Which means that,
for instance,
\partwill be typeset with large letters, and\subsubsectiontypeset with small letters. - They automatically number your sections. For example, the first
\subsectionafter the second\sectioncommand will automatically have the number2.1prefixed. - They make it easy to create an automatically updated table of contents.
Turn off Numbering
If you don’t want a section to be numbered, use its star variation.
1\section{I am a section}
2\section*{Me too!}
3\section{And three make a crowd.}
Table of Contents
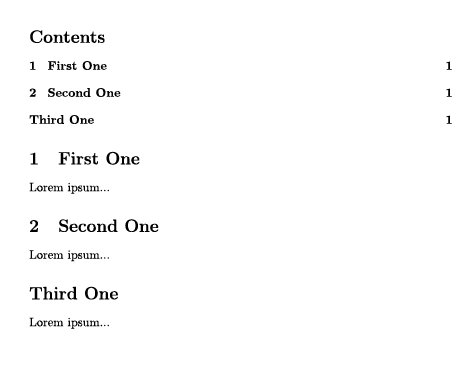
If your document has been structured well, all you have to do is call the command \tableofcontents!
This only takes into account numbered sections, however. Any non-numbered sections need to be included manually. This is done by adding the following command when you declare the section.
1\addcontentsline{toc}{sectionType}{name}1\tableofcontents
2
3\section{First One} Lorem ipsum...
4\section{Second One} Lorem ipsum...
5\addcontentsline{toc}{section}{Third One}
6\section*{Third One} Lorem ipsum...
Title Page
Right after you start the document, you have the opportunity to create a good-looking title page with some special commands: \title{title}, \author{authors}, and \date{date}
Authors need to be separated by the \and command—most other commands and symbols won’t work on a title page. You can also use the \thanks{text} command to thank anyone.
You don’t need to define all of them, and if you leave out the date, LaTeX will just use today’s date. Even when defined, you need to tell the processor when you’re done with your title page and it can be created. Use the \maketitle command.
1\title{This Is A Title!}
2\author{Made by Me \and Myself \and I}
3\date{\today}
4
5\maketitle
Abstract
Most (scientific) papers start by providing an abstract or summary of what’s inside. LaTeX has the abstract environment for that. It automatically adds the text Abstract above it, but you’ll learn later on how to customize that.
1\begin{abstract}
2This documents is about something very interesting that you can't really understand without reading it, but this will give you the summary anyway.
3\end{abstract}
Want to support me?
Buy one of my projects. You get something nice, I get something nice.
Donate through a popular platform using the link below.
Simply giving feedback or spreading the word is also worth a lot.